MINI LATHE MOTOR UPGRADE
MINI LATHE 500 WATT BRUSHLESS MOTOR
HOW TO HACK THE ELECTRONIC STEPPER CONTROLLER
UPGRADING MY LATHE TO A 500 WATT BRUSHLESS INDUSTRIAL SEWING MACHINE MOTOR OF THE CHEAPER E-BAY VARIETY.
THE STANDARD LATHE

The Amadeal CJ18A 7×14 Mini-lathe
BEAR WITH ME AS I UPGRADE THIS POST AS THE GOOGLE BLOG I WAS USING DOES NOT APPEAR IN SEARCHES so if you are here I will be getting the links and a better document together in the next days.
Mine is about 10 years old and it has been turning parts on and off during this time, but with a fairly poor surface finish and fair amount of noise. Last year the very stiff Hi/Lo gear change got to the point of not being able to change speed and had luckily got stuck in Lo.
Knowing that the standard lathe comes with a plastic Hi/Lo gear set installed in the headstock, I ordered a new headstock from Amerdeal with a metal Hi/Lo gear set.
After a year of sitting on the bench I have got around to stripping the old headstock off the lathe and replacing it with the new headstock.
This change went well after following the U-Tube videos and so I should be happy?
I have no hearing in my left ear and 3/4 standard hearing in the right ear, so noise has to be loud for me to complain.
However I can tell you those metal gears are noisy and you should use ear defenders when working on the lathe with this gear set. They also rattle a lot, all in all not what I was looking for. If you do use them then make sure to pack plenty of grease around them. May be a bit unfair as after about 2 hours of turning parts for the new lathe motor these metal gears have polished in and are less noisy than they were to start with. I still think they need to run in a dipping oil bath.
I now have a spare headstock and a mainly working lathe. My lathe has ben getting issues with the motor and motor drive controller ( a known problem and more so in countries with 120 Volt AC) therefore it is time to make my own alterations to the drive for this lathe.
A lot of these lathes are now sold with Brushless high power stepper motors and new speed controllers and with no Hi/Lo gear box.
How difficult is it to upgrade this standard lathe to a brushless version?
This is a very good link on how to do it , but it is not how I have progressed my upgrade. The Industrial sewing machine motor kit used in the video, is almost unobtainable at the moment in the UK. Similar motors and control panels are available for less money on E-Bay and as I am always game for the low cost option, I bought this industrial sewing machine motor and controller. Link to my industrial sewing machine motor kit
Below are two images from this traders web site and show what I got for my money. The trader was great and sent me a PDF of the instruction manual as I was worried that I might not be able to run the motor in reverse.
While looking at the links, have a look at a this link that looked at reverse engineering the motor controller See the problems on hacking the electronics .
Mounting the motor and controller.

Unlike the more expensive motor version in the video the mounting bracket on this motor does not come off.
So this is a blog on how I have adapted the motor to fit my lathe.
I have a spare headstock at the moment with the seized Hi/Lo gear set so I am going to convert this to the new motor drive with minimal distance between the headstock shaft and new motor.I thought it would be a good thing to replace the standard headstock bearings with taper roller bearings and there are lots of great videos on how to do this on the web. One video is so brutal when removing and fitting the bearings, it’s a wonder the headstock casting did not break. Breaking out the original bearings is not helped by the very rough finish of my headstock shaft and I must admit that I too had to be fairly brutal in removing the original bearings. I also had more problems with the removal of the change gear shaft bearings than the headstock shaft. I have spare bearings but the shaft will need some machining to replace them. I am not sure if I am going to need this change gear shaft yet, as I want to direct drive onto the headstock shaft.
Shrink the headstock shaft.
Before fitting the new headstock bearings I lightly honed the shaft in the bearing seating locations and reduced the shaft diameter by enough between the bearing seating points to allow the front bearing to travel the length of the shaft with less stress during fitting. I also put the shaft in the deep freeze overnight (plastic bagged to keep oil away from the food and the good lady away from my neck). With the shaft at minus 18 degrees centigrade and the bearings at 30 degrees centigrade, I was able to drive the bearings onto the shaft with a plastic drain pipe. The pipe is only just larger than the shaft itself so is a great way to drift the bearing bush onto the shaft. I wondered if it would take the hefty blows with a club hammer when driving the bearing on, but it took all the pressure exerted and got the front bearing seated after which I was able to follow up putting on the back bearing.
The headstock casting has quite a few holes already drilled into its surface which won’t be used as the control electronics have been removed. So can I use these threaded holes to attach my new motor. I like this idea as the old motor is at the back of the lathe, built in to the lathe bed and difficult to work on, especially as the lathe is heavy to turn round on a narrow bench in my shed.
You can drill the headstock casting, a lot of people have (putting in oiler points) but beware of where you are drilling!!!!
YOU ARE LUCKY AT THE START OF A PROJECT IF YOU HAVE ALL THE PARTS TO HAND.
I do not a present have the timing gears and timing belt that will form my new drive train.So it will be some weeks before I am can post some pictures of my hardware hack. I am having to exhibit some patience while waiting for the timing gears and and drive belt to arrive from three different suppliers to get this refurbished headstock turning again. So hang in there and at some time I will be able to post a video of the new headstock and motor drive. I am also working on a method to mechanically set the motor speed probably Servo or small linear stepper motor, it might even be a bicycle handlebar gear lever as they can have up to 8 detents to act as various speed settings. Thoughts to ponder.
Can Crusty make a safe hack into the electronics.
I think I have a simple, safe hack using an Arduino but isolation from the controllers electronics is essential.I have the inkling of any idea to hack into the electronic control and will post my findings as they happen.
Lets consider the controller
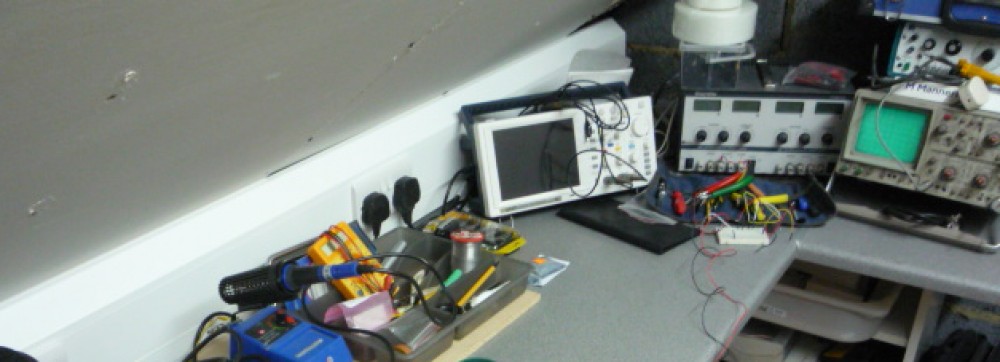
Below is the main board, the lever moves a magnet across a hall effect transistor and acts like a variable resistor but without mechanical noise. Like the report in the tear down and hack of the other type of controller, the 0 volt line in this controller is at the negative mains potential supplied from the full wave rectifier (top left of picture). At the bottom of the picture there are six drive transistors required to drive the 3 stepper motor coils in either North or South Pole mode these are insulated and heat sunk on the case casting. All in all, it looks like a nice board but there will be some hefty DC Voltages and currents being switch into the stepper motor windings.The big capacitor is 450 volt so should take most of the ripple associated with this type of mains driven DC power supply. The plugged flying leads go to the button switches and 7 segment led display on a separate board

The display board below it is marked with plus and minus for its supply which is basically 5 volts DC enough to supply the 7 segment led displays. Take note that the 0 volt rail is at mains DC negative voltage and earthed probes are not recommended. Before I start hacking into this board I need an opto coupled interface

Visual examination and Passive probing with a multimeter shows that the 2 (7 segment leds) are multiplexed with each drive pin being toggled between each display alternatively. The chip is an 74146 serial to parallel shift register which is how the micro on the main board manages to work this display board with so few connections.
You might wonder why I am taking so much interest in this board?
The board is the only way to set motor speed and direction and is a bit of pain to do so. So I intend to read and send commands to the motor controller via a better display and menu and not have to remember which code is needed to set which parameter.As I started to document this I suddenly realised that I can safely power up and probe the display board just by unplugging it from the main board and then powering it up in the electronics lab with my trusted bench power supply and attach patch pins and probes, as I want, without causing a short of the 0v line down to ground. Its a rainy day so this is a good option to get on with.
Working from the top connections.Pin 1 marked + is 5 volt dc from the main board.Pin 2 UP switch 20k ohm to + volts and connected to -V when pressed.Pin 3 DOWN switch similar electrical connection as UP switch.Pin 4 CLOCK for 74146 serial connection.Pin 5 Led 7 segment display select line.Pin 6 A&B data input for 74146 serial connection. Pin 7 marked – is 0 volt dc from main board.
The display board powers up from the bench supply with about 1 mA being drawn by each segment of a display.
I can now define that:-Pin 2 and Pin 3 push buttons go High 5V when pressed which is closed or make, held low 0V when open and not made.Pin 5 led display selector when at 0V selects right digit, with 5V left digit selected. Pin 4 clock and Pin 6 data are driven at normal TTL input levels.
I am not sure what the main board processor can output on a pin so I will use a TTL buffer to drive the opto-coupler which needs 10 mA for full turn on of the opto isolated output transistor. I have started on a design in Kicad. This design has been exported from the Kicad schematic to VeeCad, so that I can get it working first on veroboard before getting a PCB made up. Once the isolation electronics are proven on the bench, I will then work out the serial stream data that is sent to the displays and with the help of a PSoC 5 development board mimic the displays on a HD44780 4 * 20 LCD display.Then it becomes a process of writing some code on the PSoC to activate the buttons electronically for different speeds and rotations required on the motor.Back to mechanics I have the 32mm bore timing gear for the headstock drive shaft and have made a new aluminium 32mm bore spacer to get the lead screw drive gear in the right position along with the timing drive gear. The motor has a V belt pulley with a 15mm bore, the new timing gear for this has pilot hole and needs to be bored out to 15mm and awaits the arrival of a 15 mm drill. The original V pulley has a Woodruff key, so the new gear will need a set screw to stop rotation or possibly a slot for the Woodruff key? I finally opt for a hex key grub screw drilled and tapped into the timing gear.I intend to get the whole unit mounted together and then run the bearing a shaft in for a bit on the bench, before fitting on the lathe. I can monitor bearing temperature and play easily along with getting some idea of the turning speeds I will be able to programme and control with the speed lever.
I have the motor mounted and everything linked so the headstock got fitted today and powered up on the lathe. Turned a bit of brass rod on the lathe and its the surface finish is the best I have had to date the cross cut is a mirror finish and the transverse cut is good but a little rough may need a new cutter and or the mechanical feed brought on line. I am having to modify the gear plate for the mechanical feed to the cutter as the belt is a lot wider than the original. However the belt is a standard stock option and cheap as well as being powerful.


I also need to look at home build isolated probes for my scope???
